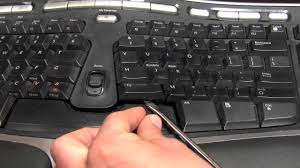
How do I fix unresponsive keyboard keys?

We’ve all been there: you’re typing away furiously; ready to conquer that deadline or chat with friends, and suddenly, a key betrays you. It refuses to register, leaving you staring at a blank space or a frustratingly incomplete sentence. Fear not, fellow typists! Before you resign yourself to a life of on-screen keyboards or frantic dictation software, let’s explore some ways to revive those unresponsive keys and get your typing game back on track.
Sometimes, the culprit behind your keyboard woes can be surprisingly simple. Before diving into more complex solutions, try these quick fixes:
Restart your device: This age-old tech trick often works wonders. A simple reboot can clear up temporary glitches and get your keyboard functioning normally again.
Check the connection: If you’re using a wired keyboard, ensure it’s securely plugged into the USB port. Try unplugging and reclogging it to see if that resolves the issue. For wireless keyboards, make sure they have fresh batteries and are properly paired with your device.
Cleanliness is key (literally): Dust, crumbs, and other debris can accumulate under keycaps, hindering their movement. Grab a can of compressed air and gently blow between the keys, focusing on the problematic ones. You can also use a soft, dry cloth to wipe down the keyboard surface.
Taking it a Step Further: Advanced Troubleshooting
If the basic checks didn’t do the trick, don’t despair! Here are some additional steps you can try:
Test your keyboard online: Websites like online keyboard test allow you to virtually press each key and see if it registers correctly. This can help you pinpoint the exact keys causing trouble and narrow down the potential causes.
Update your drivers: Outdated or corrupted keyboard drivers can lead to malfunctioning keys. Head to your device’s settings, locate the keyboard driver, and update it to the latest version.
Disable sticky keys and filter keys: These accessibility features can sometimes interfere with normal typing. Check your device’s settings and ensure these options are disabled.
Try a different USB port: If you’re using a wired keyboard, connect it to a different USB port on your device. This can help rule out any issues with the specific port you were using earlier.
For the Daring DIYers: Deep Cleaning and Keycap Removal
If you’re comfortable with a little more hands-on troubleshooting, you can attempt to clean the keyboard more thoroughly. However, proceed with caution, especially on laptops, as you don’t want to damage delicate components.
Consult your device’s manual: Most manufacturers provide instructions on how to safely remove keycaps for cleaning. Be gentle and follow the specific instructions for your keyboard model.
Use compressed air and a cotton swab: Once the keycaps are removed, thoroughly blow out any dust or debris with compressed air. You can use a cotton swab dipped in rubbing alcohol (diluted with water) to clean stubborn grime, but be careful not to damage the delicate electronics underneath.
Replace keycaps: Make sure to reattach the keycaps correctly, ensuring they snap back into place securely.
When All Else Fails: Seeking Professional Help
If you’ve exhausted all the troubleshooting steps above and your keyboard remains unresponsive, it might be time to seek professional help. Consider taking your device to a qualified technician who can diagnose the issue and recommend repairs or replacements.
Preventative Measures
To minimize the risk of future keyboard woes, here are some proactive steps you can take:
Invest in a keyboard cover: This will help shield your keyboard from dust, crumbs, and spills.
Clean your keyboard regularly: Even with a cover, it’s still a good idea to give your keyboard a occasional cleaning with compressed air.
Avoid eating or drinking near your keyboard: Spills are one of the leading causes of keyboard damage.
Remember, patience and a methodical approach is key when dealing with unresponsive keyboard keys. By following these steps and a little bit of troubleshooting, you can hopefully get your keyboard back in tip-top shape and continue typing away with confidence.
Conclusion
Unresponsive keyboard keys can be frustrating, but with the right approach, you can often bring them back to life. By following the steps outlined above, you can troubleshoot basic issues, delve into deeper cleaning methods, and even utilize online tools for diagnosis. Remember, if all else fails, seeking professional help is always an option.
Frequently Asked Questions
What if only one key is not working?
If just one key is unresponsive, the issue might be specific to that key. You can try cleaning it more thoroughly, removing the keycap for deeper cleaning, or even replacing the individual key switch (for mechanical keyboards).
Is it safe to use liquids to clean my keyboard?
It’s generally not recommended to use liquids directly on your keyboard. Stick to compressed air and a slightly damp cloth for cleaning the surface. If using any cleaning solutions, make sure they are specifically designed for electronics and use them sparingly.
How often should I clean my keyboard?
The frequency depends on your environment and usage habits. If you eat or drink near your keyboard or work in a dusty environment, consider cleaning it more frequently. A monthly cleaning with compressed air is a good starting point, with deeper cleaning every few months if needed.
My keyboard is still not working after trying everything. What should I do?
If none of the troubleshooting steps work, it’s best to consult a qualified technician. They can diagnose the problem and recommend repairs or replacements if necessary.


 English


